I never really considered grounded outlets to be a luxury but my tiny house only has a handful of grounded outlets. Worse, three of those grounded outlets are in the walls I’m demo-ing. It looks like the electrical system was upgraded to 100 amp service with a modern breaker-box, but the receptacles didn’t get an equivalent upgrade.
So I watched a couple videos on youtube and it seemed straight forward enough to replace and upgrade the receptacles, since I wasn’t doing anything fancy like hooking them up to switches.
For reasons unknown to me, I decided to start with upgrading one of the only grounded outlets, which was located in the bathroom, to a GFCI outlet. I had it all wired up when I realized that the receptacle was too big for the box. Doh. So I had to take the whole thing apart and capped off the wires with wire nuts until I could buy a new box at the store. So in essence, I had rendered the only working grounded outlet useless for the time being.
Not totally demoralized, I took down the fixture in the bathroom that was not working. I removed the connection for the very unsafe outlet, and capped off the wires. I took the whole fixture apart and discovered the issue with the pull chain. It was a super easy fix. I cleaned it up and re-installed it and now I have a working overhead light in the bathroom! The person who lived here previously, had given up on the light and left this lovely desk lamp to provide bathroom light.
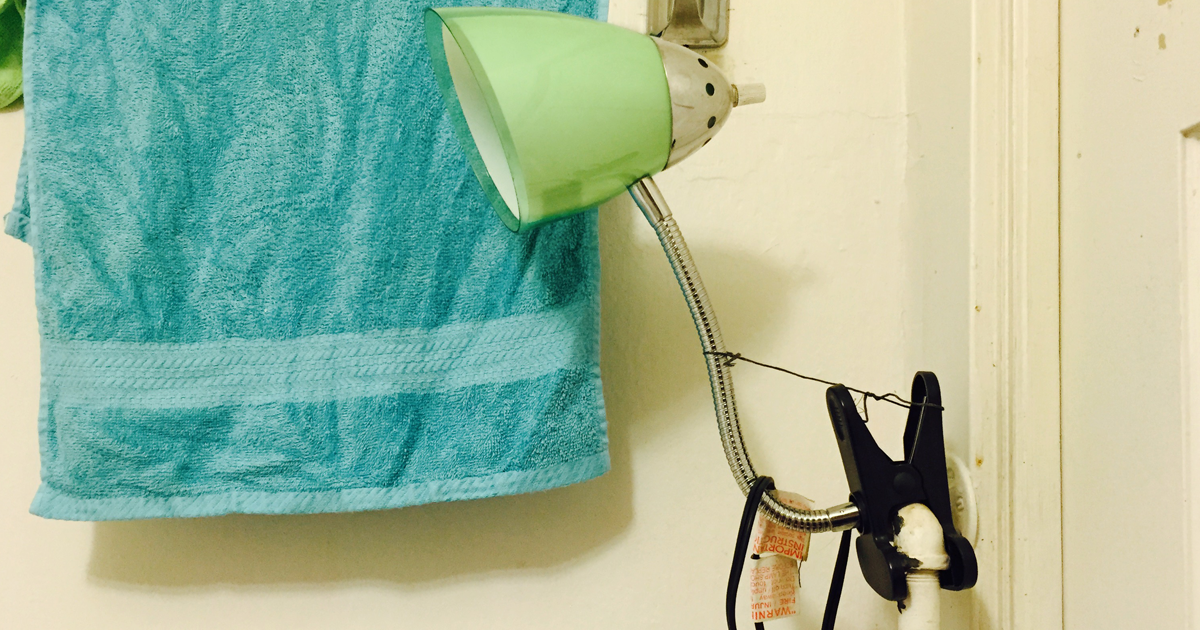
Desk lamp in the bathroom clipped to a pipe handle and held up with picture hanging wire? Seems legit.
Since the living room was cleared out in anticipation of demo, I thought starting on the 2 wall outlets in there would be the way to go. It took at least 15 minutes just to unscrew the receptacle because the screws had so many layers of paint over it. Alas, after I took the first outlet apart, I realized I had forgot to buy grounding wires and screws. Argh. You rue this day, outlets!
The next day, after another trip to the store to get grounding wires and a new box, I decided to start with the living room outlets. Easy peasy. The only issue is that the new plastic plates don’t sit over the outlets neatly because the walls are all bubbly from uneven plaster and layers and layers and LAYERS of paint.
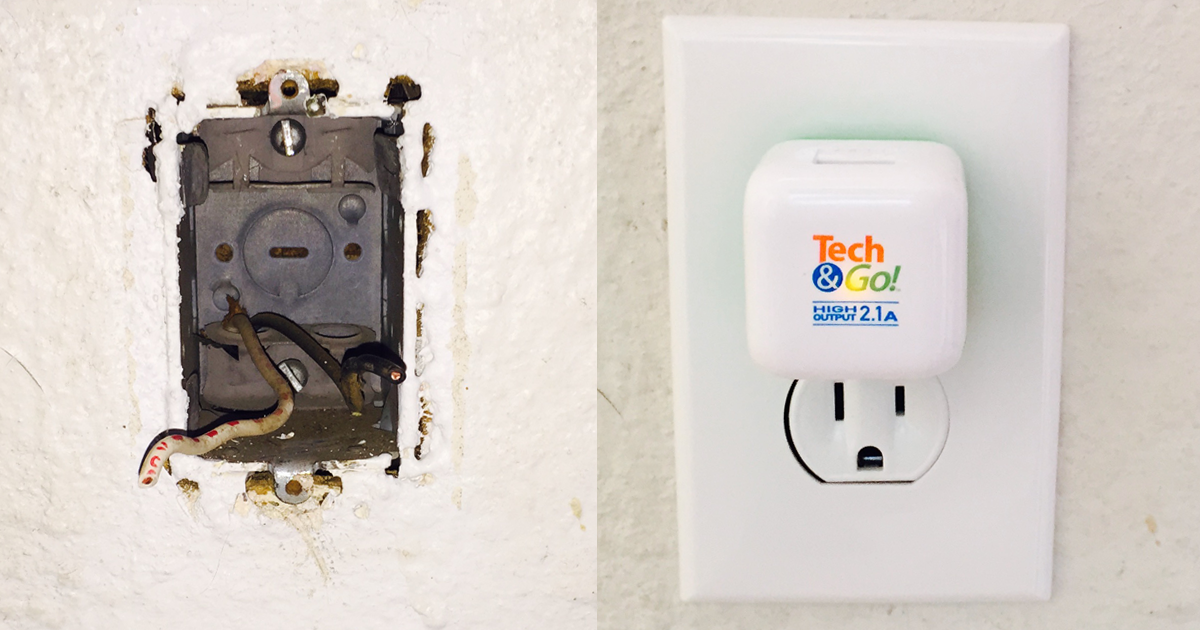
Nothing like a fresh, white plate to make you realize how filthy the walls actually are. But look – the outlet works!
Now it was that GFCI outlet’s turn. To put the new box in, I needed to cut a pretty large hole in the wall. The box attached to the stud on the right-hand side and the old box wasn’t actually screwed into the stud. It was screwed into the drywall – with a single screw. So it was only a matter of time before it popped loose.
I don’t really care about this wall too much since it’s eventually getting demoed, but I’ll patch it up anyways. I don’t really like seeing the hole in the wall and its probably not safe.
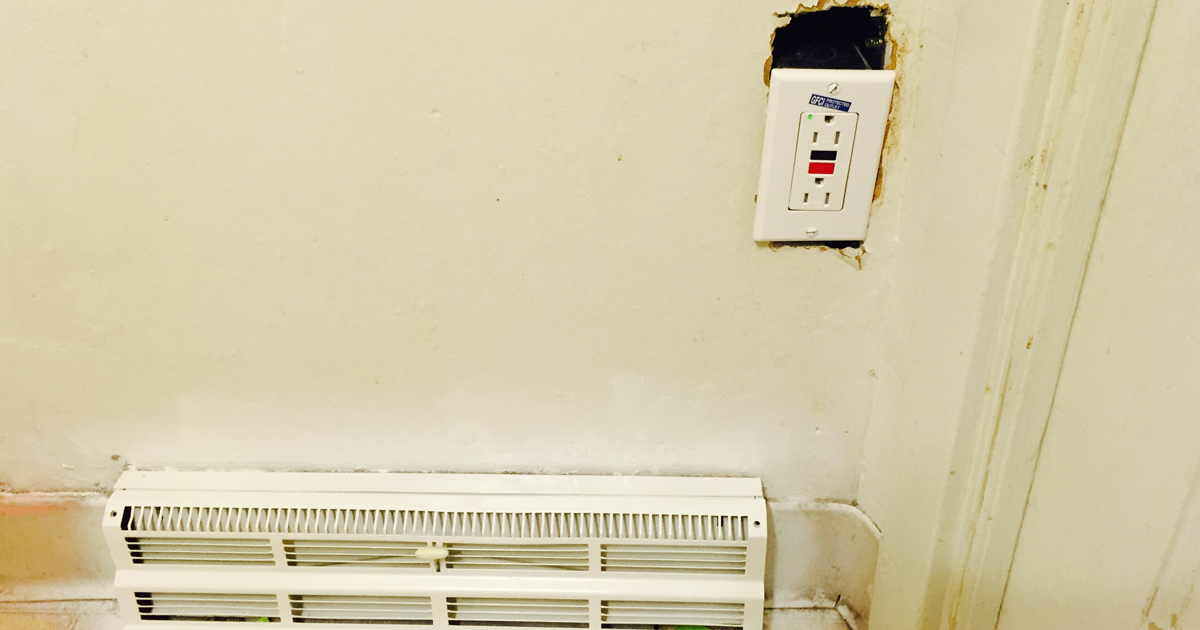
It works! It just needs to be patched.
Now that receptacle fit in the box, it was a super easy job. I turned the power back on and everything worked so I consider that a job well-done.
I still need to update the outlets in the other areas, but at least they should be easier now that I’ve done it a few times.
